I am starting another scrap quilt! The first one featured 49 unique 9" quilt blocks separated by 1 1/2" wide sashing. This new scrap quilt will contain 25 - 18" blocks, without any sashing in between. A new block will be posted every other Thursday, meaning it will take 50 weeks to finish the quilt. It sounds like a big project, but my last scrap quilt shows how any quilt is possible if you take it one block at a time.
Cutting Instructions:
White fabric
- 8 - 2 3/4" squares
- 1 - 10 1/4" square
- 4 - 6 1/2" x 2" rectangles
- 8 - 1 1/2" squares
- 1 - 3 7/8" square
Color fabric
- 8 - 2 3/4" squares
- 8 - 1 1/2" squares
- 1 - 3 7/8" square
- 2 - 3 3/8" squares
- 4 - 5 3/8" squares
- 1 - 2 1/2" square
- 4 - 2" squares
Assembly
*Note: Half square triangles (HST) allow room for trimming.
**Note: Always press to the dark fabric unless otherwise noted.
*Note: Half square triangles (HST) allow room for trimming.
**Note: Always press to the dark fabric unless otherwise noted.
Step 1: Lay 2 of the 5 3/8" squares on the 10 1/4" white fabric square right sides together according to the next photo.
Step 3: Trim along the line.
Step 4: Press back the squares.
Step 5: Lay the remaining 2 - 5 3/8" squares on each of the 10 1/4" square pieces according to the next photo.
Step 6: Mark lines down the squares as shown in the next photo.
Step 7: Just as before, sew 1/4" away from both sides of the two lines.
Step 8: Cut along each line.
Step 9: Press back the squares. You should now have 4 flying geese blocks!
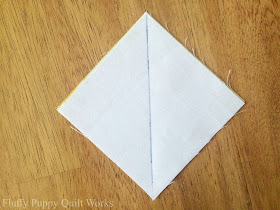
Step 11: Sew 1/4" away from both sides of the line.
Step 12: Cut along the line.
Step 13: Press open and trim to measure 3 3/8" square. You should have 2 half square triangles (HST).
Step 14: Layer the HSTs on the color fabric 3 3/8" squares right sides together.
Step 16: Cut along the line.
After doing this once, you should have 2 star point squares. Repeat with the remaining HST and 3 3/8" square pair to make a total of 4 star point squares.
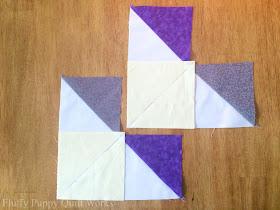
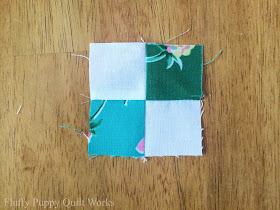
Step 17: Sew together the 1 1/2" squares according to the next 3 photos to make 4 separate squares.
Step 18: Referring to the photos, sew together the center star. Pressing: Press to the star point squares. This would be away from the center square and the corner square.
Step 19: Sew on the 6 1/2" x 2" white fabric pieces and the 2" color fabric squares.
Step 20: Sew together the 2 3/4" squares according to the next photos to make 4 separate squares.
Step 21: Assemble the block. Sew together all of the pieces according to the next photos. Pressing: Press to the flying geese blocks.


Wow its a beautiful block, and what detail in all your pictures,excellent. Thank you for all your inspiration. I'm going to try and follow along
ReplyDeleteThank you, I'm glad the pictures are clear!
DeleteGorgeous block! Visiting from Show Off Saturday.
ReplyDeleteThank you Carole!
DeleteGreat block. Thanks for the instruction &pics
ReplyDelete