Cutting Instructions
White Fabric
- 4 - 2 1/2" squares
- 4 - 3 3/8" squares
- 2 - 4 3/8" squares
Color Fabric
- 60 - 2 1/2" squares
- 4 - 3 3/8" squares
- 2 - 4 3/8" squares
Assembly
*Note: Always press to the color fabric unless otherwise noted.
**Note: Half squares triangles (HST) allow plenty of room for trimming. To make HSTs with some trimming space, reduce square size by 1/4". To make HSTs without trimming space, reduce square size by 1/2".
Step 1: Make the first set of nine patch blocks. Referring to the next 5 photos, sew together 9 - 2 1/2" color fabric squares per nine patch block. Make a total of 4 nine patch blocks. You will use 36 - 2 1/2" color fabric squares for these 4 blocks.
Press the top and bottom rows to the left and right. Press the center row to the center square.
Step 2: Make the half square triangles (HST). Use the 3 3/8" squares. Lay a white 3 3/8" square on a color fabric 3 3/8" square right sides together. Mark a diagonal line along the squares, then sew 1/4" from both sides of the line.
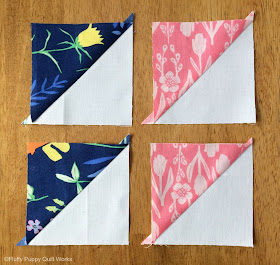
Cut along the line, then press open and trim to measure 2 1/2" square.
Make a total of 8 HSTs.
Step 3: Repeat the previous sewing method with the 4 3/8" squares to make 4 larger HSTs. Trim these to measure 3 1/2" square.
Step 4: Sew these HSTs together to make the center pinwheel. Press to the top left and bottom right HSTs. This would be the dark blue ones in the photos.
Step 6: Assemble the block. Sew together the center pinwheel and 8 nine patch blocks. Press to the center pinwheel, and the nine patch blocks without HSTs.


Thank you for a great photo tutorial - it's a lovely block:)
ReplyDeleteThank you Lesley, I'm glad you like the tutorial!
DeleteThanks for the great tutorial!!
ReplyDelete