
Cutting Instructions
Red Fabric
- 1 - 5 1/4" square
- 4 - 2" x 3 1/2" rectangles
- 2 - 2 1/8" squares*
*Cut these diagonally into a total of 4 right triangles.
Blue Fabric
- 2 - 5 1/4" squares
White Fabric
- 1 - 5 1/4" square
- 1 - 2 1/2" square
- 4 - 2" x 3 1/2" rectangles
*Note: Always press to the color fabric unless otherwise noted.
**Note: Half squares triangles (HST) allow plenty of room for trimming. To make HSTs with some trimming space, reduce square size by 1/4". To make HSTs without trimming space, reduce square size by 1/2".
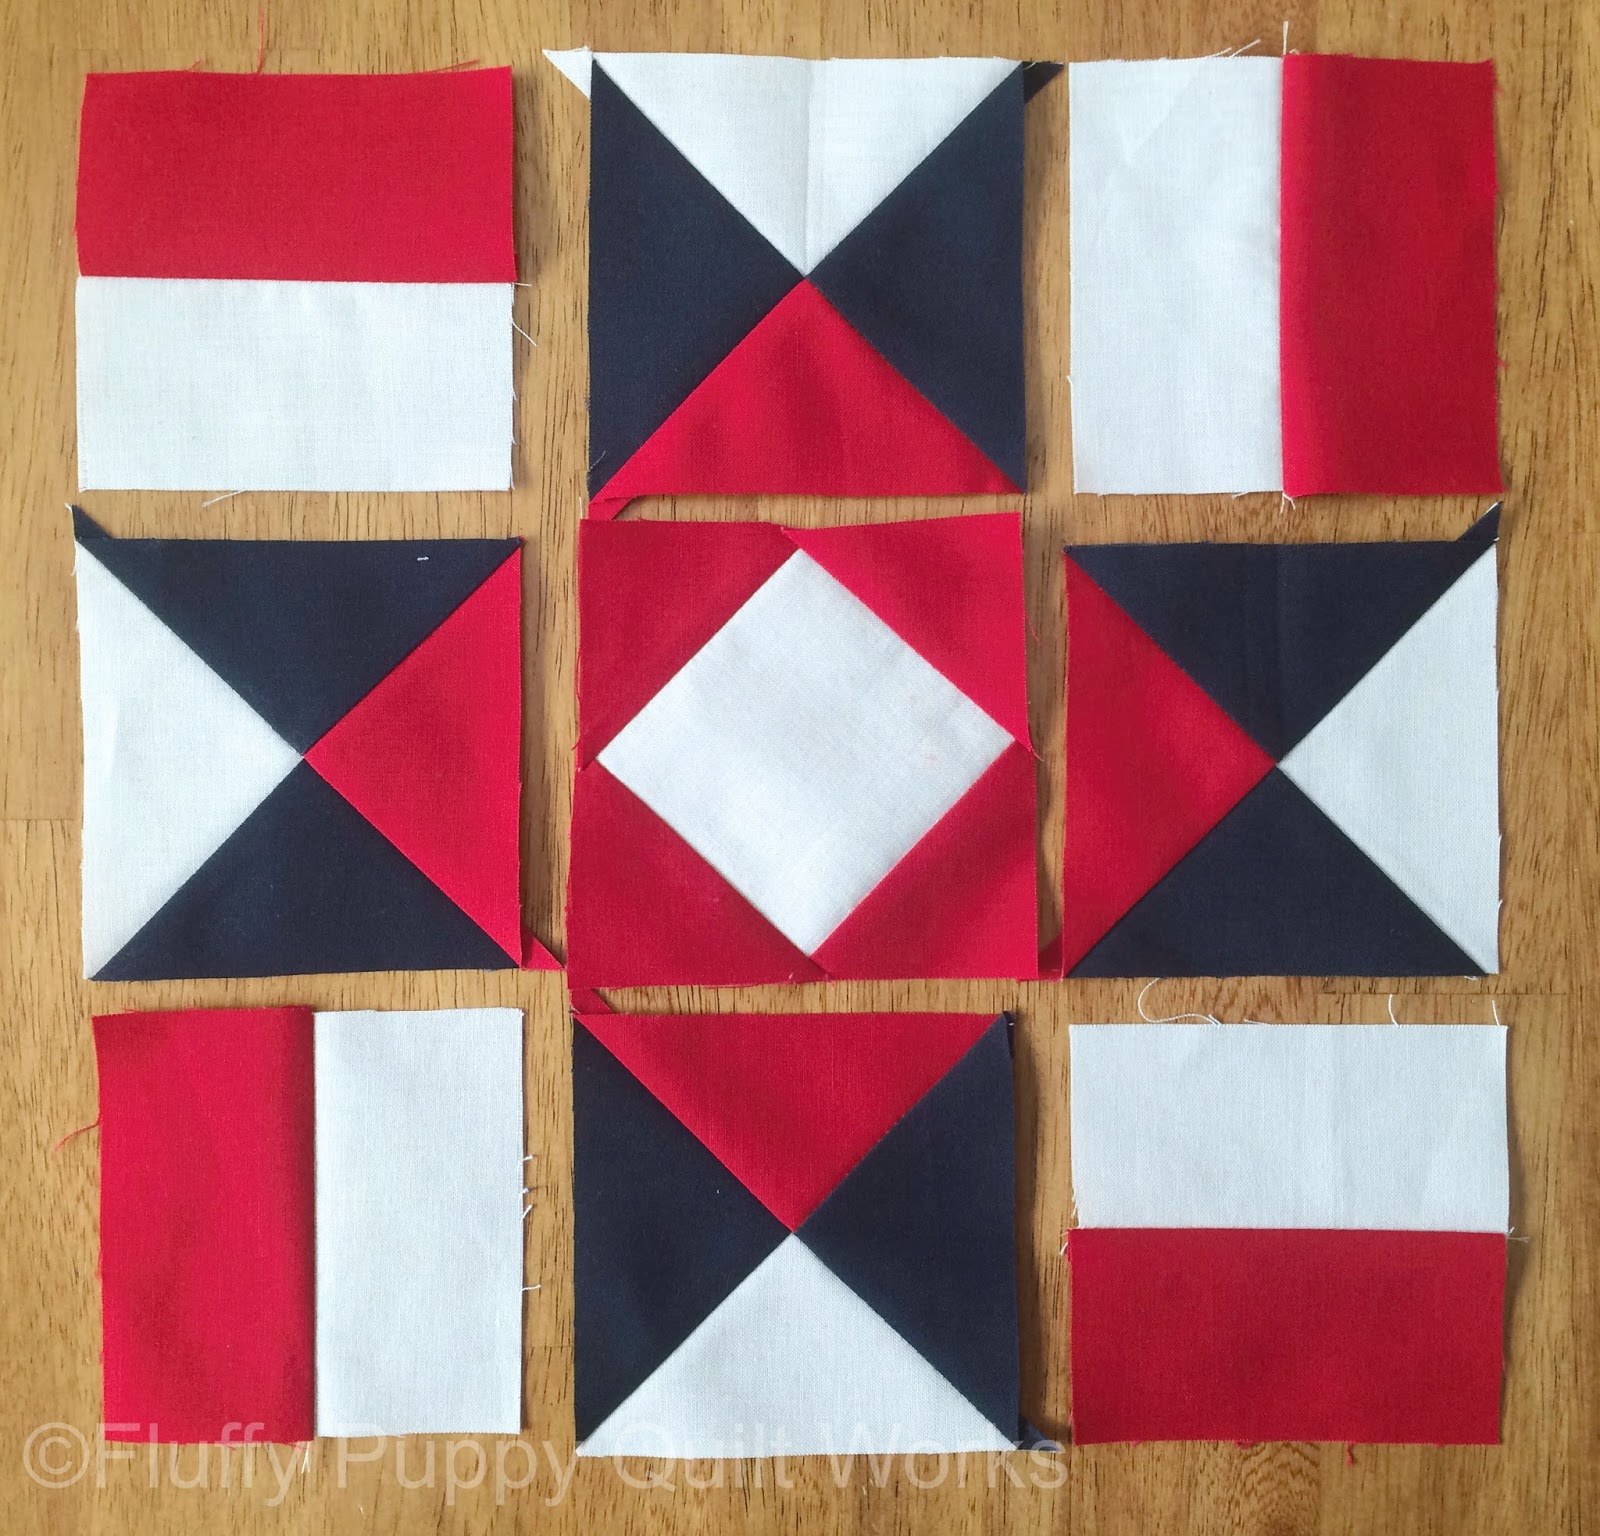
Step 1. Make the corner squares. Referring to the next 2 photos, sew together 1 red fabric 2" x 3 1/2" piece and 1 white fabric 2" x 3 1/2" piece per corner square. Make a total of 4.

 |
| Make 4. |
Step 2. Make the half square triangles (HST). Use the 5 1/4" squares. Lay a white 5 1/4" square on a blue fabric 5 1/4" square right sides together. Mark a diagonal line along the squares, then sew 1/4" from both sides of the line.


Cut along the line, then press open and trim to measure 4 3/8" square.


Step 3. Repeat the previous sewing method with the blue 5 1/4" square and the red 5 1/4" square.

Step 4. Make the quarter square triangles (QST). Lay 1 red/blue HST on a white/blue HST right sides together with the seams parallel to each other. Mark a line perpendicular to the seams, then sew 1/4" away from both sides of the line. Refer to the next 3 photos.


Cut along the line, then press open and trim to measure 3 1/2" square.

Repeat with the remaining HSTs to make a total of 4 QSTs.

Step 5. Make the center square. Sew the 2 1/8" right triangles onto the sides of the 2 1/2" white fabric square. See the next 5 photos.


No comments:
Post a Comment