


This table runner looks complex, but it isn't. It's just a simple French braid quilt turned into a table runner. Plus, the tutorial is written using yardage or fabric strips from a jelly roll! What is a jelly roll? It is a precut fabric bundle that includes 2 1/2" x WOF strips, and they usually include 40 of these strips per bundle. You only need 6 jelly roll strips to make a 13 1/4" x 47 3/4" runner, plus 3 for the binding, so it's possible to make 4 of these from one Jelly Roll. You can use yardage for the binding instead of jelly roll strips, but if you want to keep using precuts the jelly roll strips work just fine.
I made this pattern 4 different times, varying the size the first couple of times. I decided to base the pattern using a 9 1/2" center square because it can be easily lengthened or shortened, yet maintain the same 12 3/4" width. Changing the length of this runner is easy; simply add more or less strips and squares onto the center square. Altering the width is also fairly easy, however it does require changing the size of the center square, thus changing the length of the strips that are sewn onto it. The length of the fabric strips must equal the length of the center square.

The center square in this table runner pattern measures 9 1/2" unfinished and is made by sewing together 2" x 9 1/2" strips cut from 2 of the jelly roll strips. It is possible to cut this 9 1/2" square from yardage, so you do not have to sew it together if you don't want to. Also, if you use yardage for the center squares, that means more leftover jelly roll strips so you can make more table runners from one jelly roll!

Easy French Braid Table Runner
Finsihed size:
13 1/4" x 47 3/4" (inclusive of binding)
Difficulty:
Confident Beginner
Recommended skills:
Fabric cutting, fabric piecing, quilting, and quilt binding.
Width of fabric (WOF) assumed to be 41".
All seam allowances 1/4".
 Print Pattern
Required Tools
- Rotary Cutter
- Cutting Mat
- Fabric Scissors
- Acrylic Ruler
Fabric Requirements
- For the fabric strips and squares: 1/8 yard each of 6 different prints (or 6 fabric strips from a jelly roll)
- For the center square: 1 fat quarter or 1/3 yard (or 2 fabric strips from a jelly roll)
Notes
1. Changing the size of the table runner is fairly easy. Lengthen the runner by sewing more strips and squares onto the center square, shorten it by sewing on less. Change the width by changing the width of the center square. If the length of the center square is changed, the length of the fabric strips will also need to be changed to equal the length of the center square.
2. The center square can be cut from yardage instead of being pieced together from jelly roll strips. To do this, you need either 1/3 yard of fabric or 1 fat quarter. Changing the size of the center square will change the size of these fabric requirements. More unused jelly roll strips = More jelly roll table runners!
3. You can use jelly roll strips or yardage for the binding, whichever you prefer. If you change the size of the runner, you will also need to recalculate the binding.
4. As with all quilt piecing, a consistent 1/4" seam allowance is important. Be sure to sew straight, any wobbly seams may show where those long fabric strips are being sewn together.
Cutting Instructions
- 1 - 9 1/2” square OR 6 - 2” x 9 1/2” strips (Can be cut from 2 jelly roll strips.)
- 24 - 2 1/2” x 9 1/2” strips (Can be cut from 6 jelly roll strips. 4 - 2 1/2” x 9 1/2” pieces per jelly roll strip.)
- 12 - 2 1/2” squares (Can be cut from 1 jelly roll strip.)
- 3 - 2 1/2” x WOF strips for binding (3 jelly roll strips can be used.)
Assembly


Step 2: Begin sewing the remaining fabric strips and small squares onto the center square. Take 2 matching fabric strips and one small square. Sew the small square onto the end of one fabric strip, pressing to the fabric strip. Next, sew the second fabric strip onto one side of the center square. Again, press to the fabric strip. See the next 2 photos.
 |
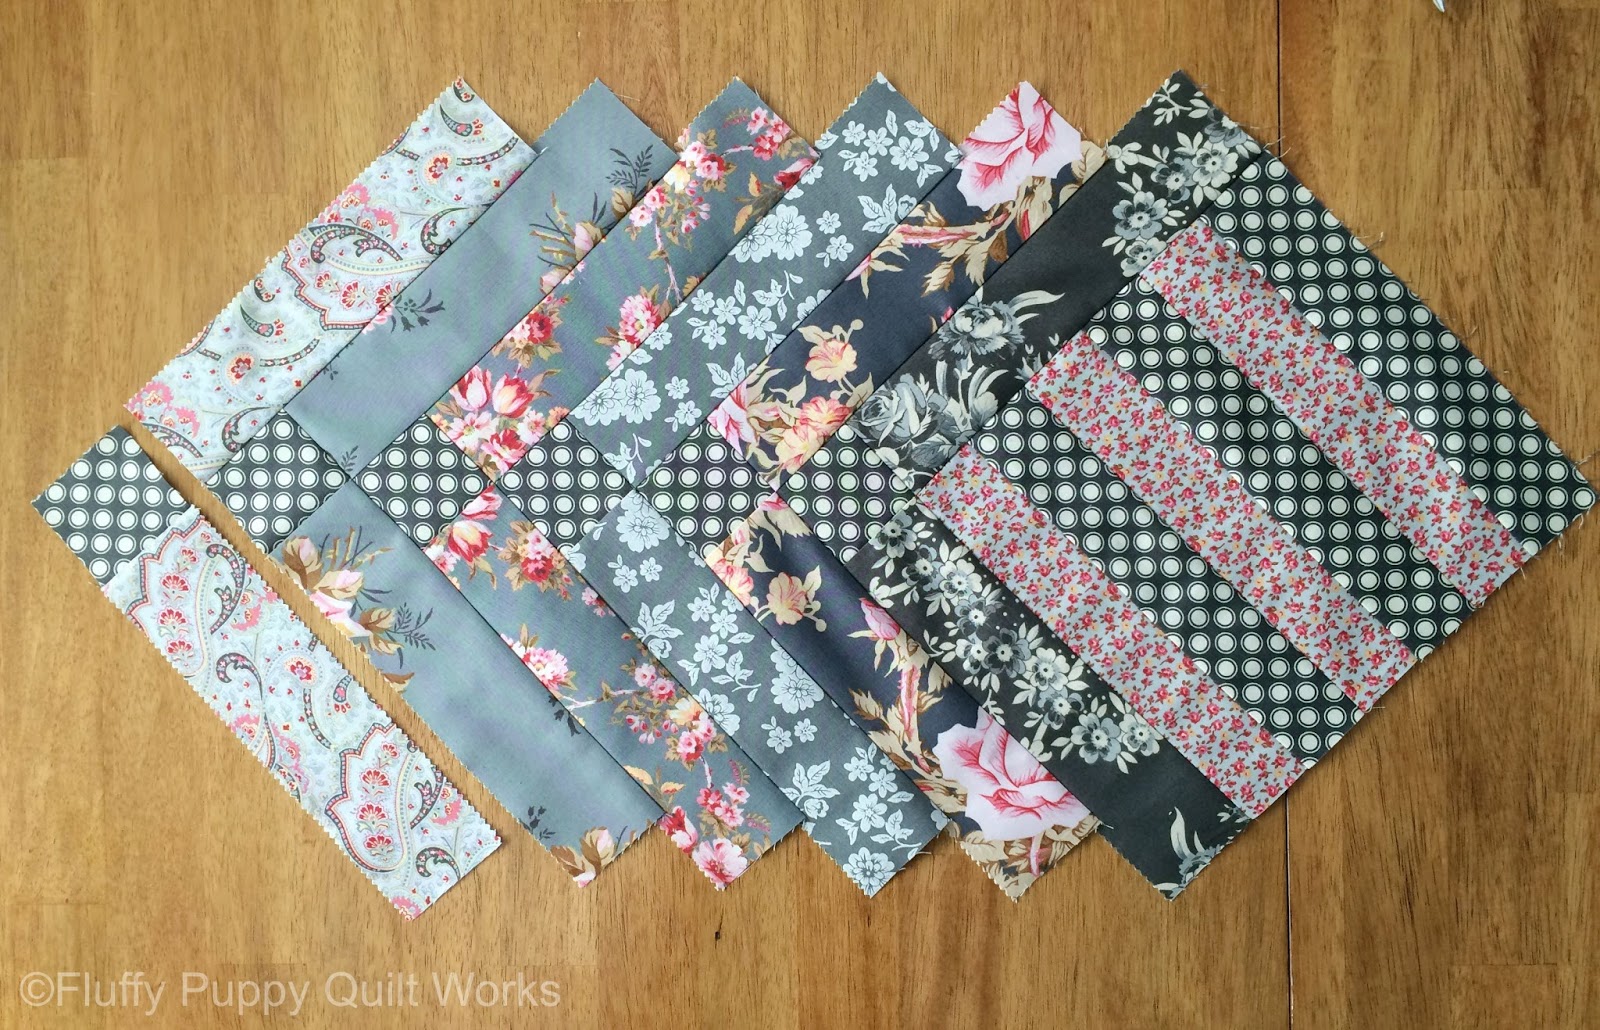
| These are the 24 - 2 1/2" x 9 1/2" fabric strips I used in my table runner. |


Step 3: Continue sewing sets of strips and squares onto the center square using the previous sewing method. You will use half of the 24 - 2 1/2" x 9 1/2" strips on each side of the table runner.


Step 4: Repeat the previous steps of sewing on the fabric strips on the opposite side of the runner using the last half of the 9 1/2" long fabric strips.


Step 5: Trim the sides of the runner. Refer to the next 2 photos.


When you do this, leave a 1/4" seam allowance at the corners of the center square. This is so that when the binding is sewn onto the quilt using a 1/4" seam allowance, the points of the center square will end perfectly at the binding.


Step 6: Layer, baste, then quilt as desired. Bind to finish.
My quilt binding tutorial can be found here.

The table runner is lovely. The directions are very well written and easy to understand. Thank you for sharing the pattern.
ReplyDeleteThanks KatieQ!
DeleteThanks for this great tutorial - you made it look easy and I will definitely give it a try :)
ReplyDeleteThank you Lesley, I'm glad you liked the tutorial!
DeleteSuch a well written tutorial. I've been looking at these table runners and this is really helpful. I might try one of these in the new year.
ReplyDeleteThanks Jayne! These table runners are so fun to make.
DeleteThank you for the lovely tutorial!
ReplyDeleteSo pretty and the tutorial makes it seem easy (even for a non-quilter!). Thanks for linking this to the Craftastic Monday Link Party at Sew Can Do. You'll be featured next week!
ReplyDeleteThank you Cheryl!
DeleteThe table runners look great! Good job on a lovely tutorial.
ReplyDeleteThese are lovely! Thanks for the tutorial! We featured your table runners over on the FWFS blog! Thanks for stopping by and linking up! :)
ReplyDeletehttp://fortworthfabricstudio.blogspot.com/2016/12/fabric-frenzy-friday-features_14.html
-Lindsey
Nice. Thanks for making the tutorial easily saved! I don't tend to buy jelly rolls so will use my own stash to try this one. Thanks
ReplyDelete