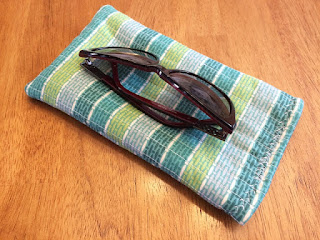
You can never have too many zipper bags and pouches, there is always a use for them. This quilted star zipper pouch comes together fast, and it's a great quilting practice project. No need to invest in the supplies for an entire quilt, this little bag lets you practice your quilting easily. The star design is bold and eye catching no matter the colors you choose. I made one in solid and and white, and another in black and white. The red and white pouch I made to be rectangular, while the other is square. I also offset the star on the black and white bag. The addition of borders to the star allows you to customize the shape and size of the finished pouch without changing the star block at all. Or, you could even omit the borders entirely. Doing so would produce an adorable, 6" square zipper pouch.
The star itself is fairly easy. It is a good intro to half square triangles (HST) quilting project. HSTs are one of the most popular quilt squares, there are so many possible quilt designs that utilize them.
For a larger bag, you can make multiple stars and sew them together to create a mini quilt top. For example, 4 stars would make a 12" square, and 2 stars quilt make a 6" x 12" bag. It is even easy to experiment with different fabric colors. Use different colored squares for the red fabric squares for a scrappy look, like my Scrap Quilt 2015-2016. Less contrast between the two fabric colors would create a less bold star. You could even make the star on each side different from each other!
There are several ways to customize this simple zipper pouch to make it your own.
- Change the fabrics for the stars. Whether or not the stars on each side match doesn't matter. It's your zipper bag, make it double sided if you want to!
- Quilt as desired, not like I quilted it! You can quilt the stars however you want to. Straight line quilting, like I quilted both of mine, or something more complex.
- The size is easy to alter. Add or subtract borders from all 4 sides of the star, and make the borders as wide or as thin as you want to. Or, make multiple stars and sew them together to make the sides. You could also change the star size by making larger or smaller HSTs.
- Use whatever type or color of zipper you want. I used a standard plastic zipper for both of mine, but you could purchase a metal zipper to make a more durable zipper pouch.
What you need:
For the star:
From fabric #1:
- 16 - 2 7/8" squares
From fabric #2:
- 16 - 2 7/8" squares
For the lining:
- 2 pieces that match the size of your outer fabric pieces. For my red and white bag, I used 2 - 6 1/2" x 8 1/2" pieces.
Optional from either fabric:
- Border pieces to increase the zipper pouch size. I cut 2 - 6 1/2" x 1 1/2" pieces for my red and white bag.
Other materials:
- 1 zipper that is the length you want. The zipper for my red and white bag was a 7" zipper.
Special equipment:
- The zipper foot for your sewing machine. Check your sewing machine manual to see if one came with your machine. If you do not have one, sewing on the zipper will be difficult and close to impossible if you do not have a thin enough presser foot.
 |
| Just the 2 1/2" squares. |
 |
| The 2 1/2" squares and the border pieces. |
Step 1: Make the HSTs. Lay a white square on top of a red square right sides together. Mark a line along the squares, then sew 1/4" away from both sides of the line. Cut along the line. Press open and trim to measure 2" square.
Make 16 HSTs.
Step 2: Assemble the block. Referring to the next 4 photos, sew together the HSTs. Pressing: Press the first and third rows of HSTs to the right. Press the second and fourth rows to the left.
 |
| Press the first and third rows of HSTs to the right. Press the second and fourth rows to the left. |
Optional Step 3: Sew on the border pieces to bring the zipper pouch to the desired size. Pressing: Press to the border pieces.
Step 4: Layer your star blocks onto pieces of quilt batting. Pin if needed. Quilt as desired.
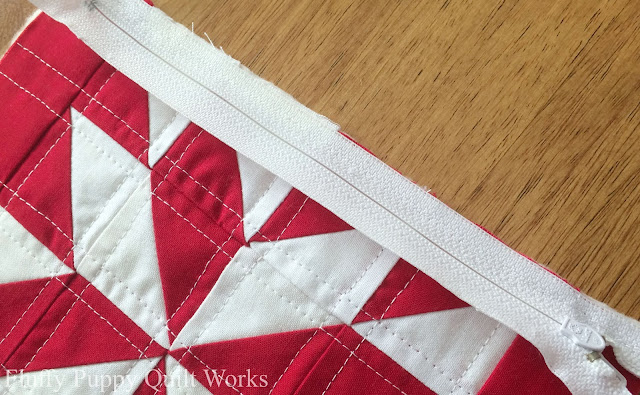
Step 5: For this step, you will need to switch to your zipper foot. Lay your zipper along the top of one of the quilted star blocks right sides together. Pin in place then sew.
 |
| It's hard to see my seam because my thread matches, but the zipper is sewn to the star. |
After sewing the zipper to the tops of both quilted stars, your zipper pouch should resemble the two photos below.
Step 7: Fold the pieces so that the zipper lays flat and the wrong side is showing. Lay one of the lining pieces on the zipper right sides together, pin in place, then sew onto the zipper. You will be sewing through the lining fabric, the zipper, and one of the quilted stars all at once.
When the quilted stars are flat, your zipper pouch should resemble the photo below.
The photo below shows the lining pulled back to reveal the right side of the lining fabric, and the wrong sides of the zipper and the quilted star. I used an almost see-through lining so you may be able to see the seams underneath.
Step 8: Fold the pieces so that the zipper lays flat and shows the wrong side that has not had a lining piece sewn to it. Align the lining with the edge of the zipper, pin in place, then sew. Again, you will be sewing through the lining fabric, the zipper, and one of the quilted stars.
When the lining pieces are pulled back to reveal the right sides of the fabric, your zipper pouch should resemble the photo below.
Optional Step 9: Sew along the edges of the quilted stars, right next to the zipper. This helps keep the lining down in the zipper pouch and the quilted stars flat around the zipper, but it is not completely necessary.
Step 10: Open the zipper 2/3 to the 3/4 of the way. This is so you can reach through it to turn the zipper pouch right sides out. Lay the quilted stars right sides together, and the lining fabric right sides together. Pin together, then sew around the perimeter using a 1/4" seam allowance. Leave an opening at the top of the lining 4"-6" wide. Important: Make sure the zipper teeth are against the lining. This is shown in the third and fourth of the next few photos.
 |
| Sew around the perimeter, leave an opening in the lining. |
Step 11: Trim all 4 corners so that when you turn it right sides out, they will lay better.
Step 12: Hand or machine sew the opening in the lining shut. Usually I machine sew the opening closed. Sometimes I do want to hand sew it shut so that the seam is invisible, but this depends on which method you are most comfortable with.
Stuff the lining back down into the zipper pouch once the opening is sewn shut, and it's done! You can experiment with the size by adding larger borders, or adding none at all. It's even easy to change the size of the quilt block. Making 3" HSTs instead of 2" would produce a 10" quilt block. Thank you for reading!
Related Posts:
Rounded Zipper Pouch PDF and Tutorial
Quilted Sunglasses Pouch


Great tutorial!
ReplyDeleteThank you for the wonderful tutorial!
ReplyDeleteGlad you liked it, thank you!
ReplyDeleteNice pouch! Thanks for sharing the tutorial on Midweek Makers
ReplyDeleteSusan
Thanks, I love getting to visit all the blogs on Midweek Makers!
DeleteThe pouches are so cute. I ca't believe all the work that you put into them. I may need to try this one soon.
ReplyDeleteWhat a great way to use a couple of blocks! Thank you for the tutorial....pinned.
ReplyDeleteWhat a great zipper pouch!! Love this idea and I love stars. this just pushed everything else down a notch on my to do list. TFS!
ReplyDeleteThank you, I had fun turning one of my favorite quilt blocks into a zipper pouch!
DeleteGreat tutorial! Love the pictures. I'm off to make some little zipper pouches : )
ReplyDeleteThank you Sheila, happy sewing!
DeleteSuper cute pouch, and a great tutorial! Thanks for sharing, Abby! Whoop whoop!!
ReplyDeleteBeautiful pouch and a wonderful tutorial! Thanks for sharing!
ReplyDelete