


This heart pincushion is a super easy sewing project, and it's a great Valentine's Day decoration for your sewing room. The tutorial shows how to make a large checkered heart pincushion that measures about 7" x 7" once completed. In the downloadable pattern, three heart template sizes are available: Large, medium, and small. The medium and small sizes are pictured above and below.
Scroll down to download the free PDF and view the online photo tutorial.
I usually don't bother to change out my pincushion. If I do get an idea for a new pincushion design, I will make it and then put all of my pins into the new pincushion, but otherwise I tend to keep using the same pincushion. This Valentine's Day pincushion may have changed that, I might have to change pincushions for every holiday! I keep my pincushion right next to my sewing machine, so even when I am not using pins I get to see it as I sew. A pincushion is a nice, small holiday decoration that is also functional.
I haven't made many themed pincushions. My only other pincushion tutorial that is currently on the blog is my cube pincushion tutorial. In the past, the pincushions I have made were either simple square pillow pincushions, or hand sewn felt pincushions. Today's heart shaped pincushion was a nice change.

The assembly of this pincushion is super simple.
- Cut out the large heart shape template, then use it to cut out a piece from the red fabric for the back of the pincushion. Then, cut out the fabric strips listed in the cutting instructions.
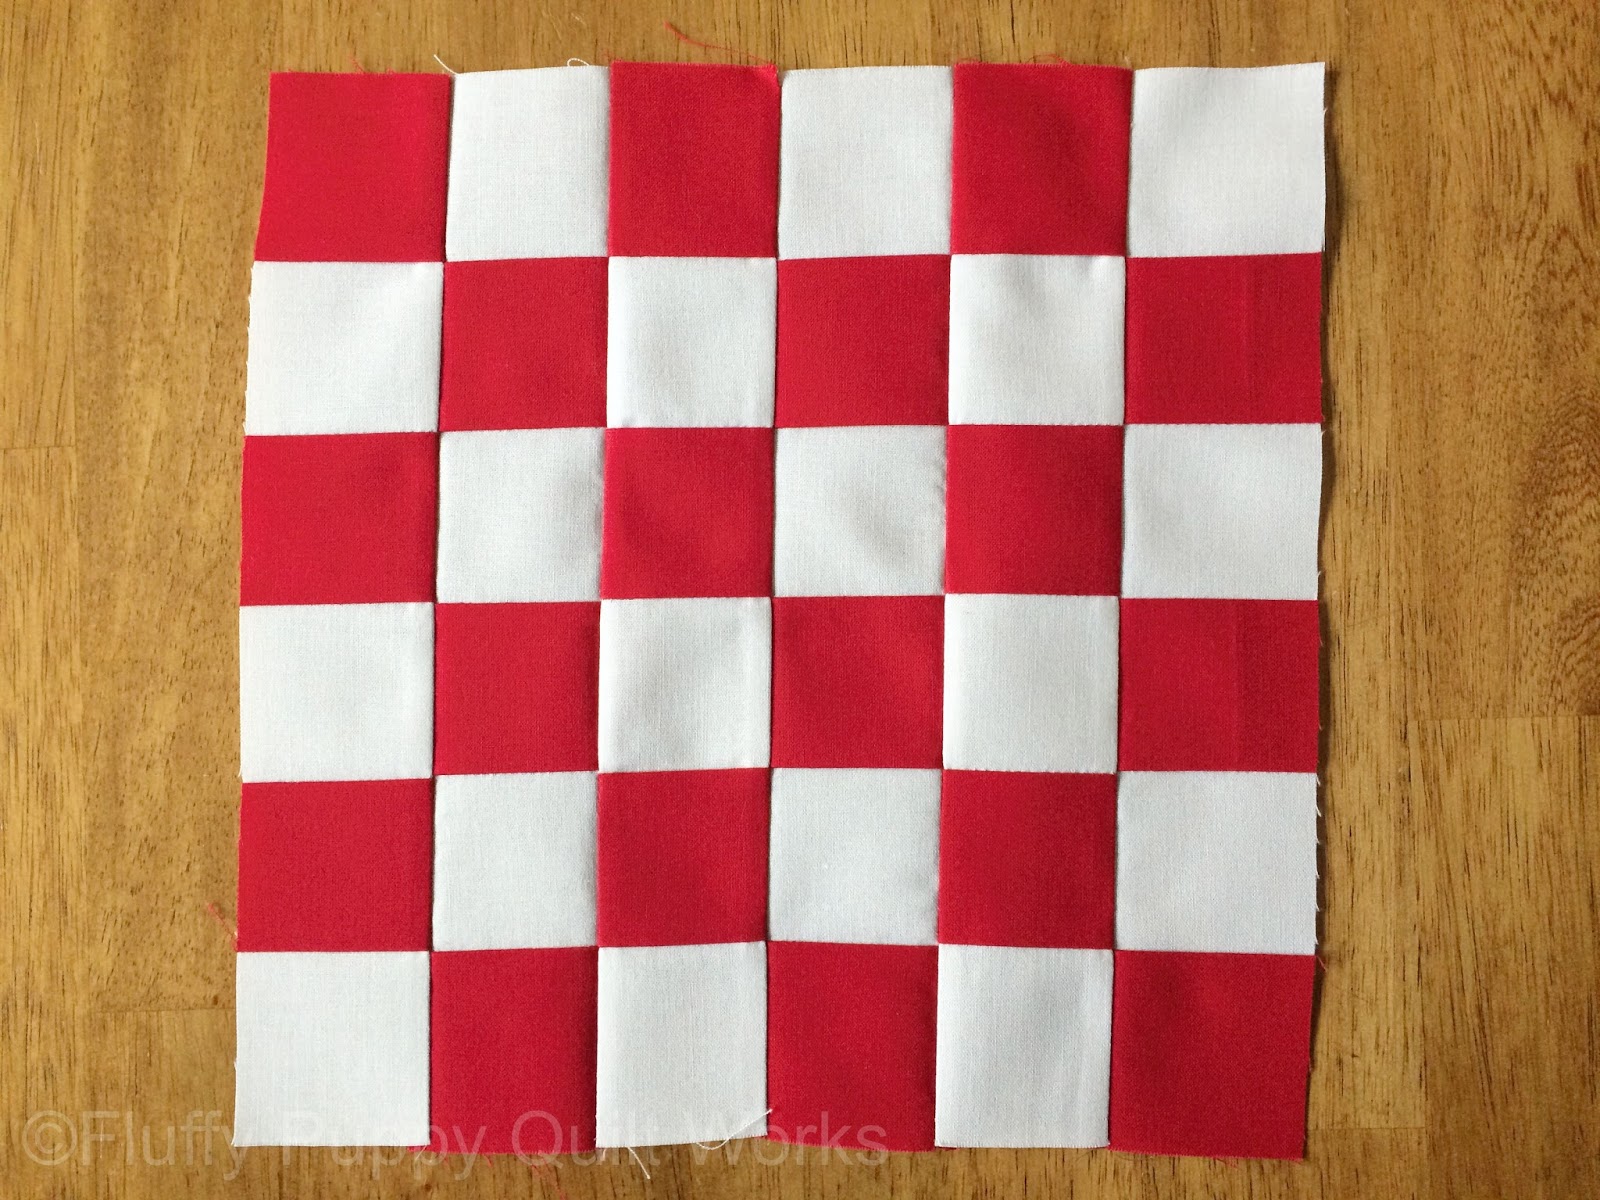
- Once all the pieces are cut, sew together fabric strips. Cut them into segments, then sew them back together to quickly piece together the checkered squares. This is a fast strip piecing method that makes sewing together small squares easy.
- Next, use the large heart template to cut out a heart shape from the checkered squares. Layer the backing piece onto the checkered piece right sides together and sew around the perimeter using a 1/4" seam allowance. Leave an opening for turning.
- Turn right side out, and stuff! Hand sew the opening closed.
Nothing too complex goes into making it. If you don't like the checkered look, using solid fabric works just as well. I used solid fabric for my medium and small pincushion.


Heart Shaped Pincushion
Finsihed size:
7" x 7"
Difficulty:
Confident Beginner
Recommended skills:
Fabric cutting and fabric piecing.
Width of fabric (WOF) assumed to be 41".
All seam allowances 1/4".
 Print Pattern
Required Tools
- Rotary Cutter
- Cutting Mat
- Fabric Scissors
- Acrylic Ruler
Required Materials
- Red fabric - 1/8 yard
- White fabric - 1/8 yard
- Polyester stuffing - amount can vary
- Optional - 2 pieces of quilt batting at least 10" x 10".
Notes
1. Be sure to follow step 6 and sew around the perimiter of the checkered fabric squares. When you turn the pincushion around before stuffing it, the seams can easily pull apart.
2. Cut out the medium or small heart template to make a smaller pincushion.These sizes work best using solid pieces of fabric. You can make them checkered like the large heart, however I am unsure of the exact fabric square size.
3. Quilt batting is optional, but recommended. It adds a nice protective layer behind the fabric. Quilting is also optional. I preferred the look of the pincushion without quilting, so I did not quilt mine. I did quilt the medium sized pincushion and the small pincushion and found that it did not effect the pincushion, it only changed the appearance.
Cutting Instructions
Red fabric
- 3 - 2" x 12" strips
- 1 - heart shaped piece, cut using large heart template (this will be for the back of the pincushion).
White fabric
- 3 - 2" x 12" strips
Assembly
Step 1. Sew together the 2" x 12" fabric strips, alternating the fabric color. Refer to the next 6 photos. Pressing: Press to the red fabric.


Step 2. Cut apart the strips into 6 - 2" wide segments. See the next 2 photos.


Step 3. Rotate every other fabric strip segment so that the fabric colors alternate, creating a checkered pattern. Sew together the segments. Refer to the next 4 photos. Pressing: Press in any direction.


Step 4. Cut a heart shape from the checkered fabric piece using the large heart template.


Optional - Step 5. Layer the heart shaped piece on a piece of quilt batting. You can leave the fabric as is, or quilt it as much as you want.

Important - Step 6. Even if you did not layer the fabric onto quilt batting, sew around the perimeter using a scant 1/4" seam allowance. This prevents the seams from ripping apart as you assemble the pincushion.


Optional - Step 7. If you layered the fabric heart onto quilt batting, trim off the excess batting.

Step 8. Place the red fabric heart backing piece onto the previously constructed checkered piece right sides together. Pin together securely, then sew around the perimeter using a 1/4" seam allowance. Leave an opening 2" - 3" wide on one of the straight edges of the heart shape.


 |
| Opening left for turning around. |

Step 10. Turn the heart around, then stuff it with as much stuffing as you want! Exact stuffing amounts vary depending on desired pincushion density, and the brand of stuffing you are using.


Step 11. Hand sew the opening shut. There are many different methods for this, so find the one that works best for you.

Thank you for reading, happy sewing!
This is so cute!!
ReplyDeleteThank you Ariane!
DeleteI've never seen a heart shaped pincushion - so cute! Thanks for sharing your tutorial on Main Crush Monday!
ReplyDeleteThanks Beth, I enjoy browsing all the fun blog posts on Main Crush Monday!
DeleteThank you for sharing! A great Guild gift! :)
ReplyDeleteOk. Your project is so cute I just had to explore your blog. And guess what? You have a new follower! Love your patterns and ideas! Looking forward to getting to know you!
ReplyDeleteThanks so much!
DeleteYour version of a heart shaped pin cushion is really cute.
ReplyDeleteHi there
ReplyDeleteJust stopped by to let you know that I featured this on my Round Tuit post this week!
A Round Tuit 348
Thanks again for linking up to A Round Tuit Hope you have a great week!
Jill @ Creating my way to Success
Thank you Jill! I love getting to browse all the fun blog posts in the link party.
Delete